Currently, we are connected to city water, but that’s something that we want to change. It’s been our plan for quite some time, but the municipal water has been convenient. There is a shallow well down the hill on which I have a hand pump and have used for watering livestock. There’s also a spring that flows about 9 months of the year. We also have the pond now. So, there are alternative water sources available.
We also want to cistern rain water that we can catch off of our house roof. In September of 2008, I decided to start constructing a cistern inside the shed portion of our garage. The garage is a pole building that has an original area of about 24 feet by 40 feet. The previous owner built the garage and also added some space on one side that is about 12 feet by 40 feet. We used this shed portion as a goat/chicken barn for a few years. With gutters we should be able to harvest quite a bit of water off of the roof. Additionally, locating a cistern here would allow us to let gravity provide water pressure to our new house, because there is about a 50 to 60 foot elevation change between the two.
It is inside the shed that I began the construction of a ferro-cement cistern. The basic idea for ferro-cement construction is to build a metal framework that provides strength and structure. This framework is then plastered with a cement-sand mixture that makes it so it will hold water.
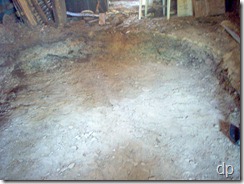 The first thing to do was to provide a level space for building the cistern. I used hand tools: a shovel and a grub hoe mainly. I hauled the material that I dug out outside and dumped it on the hill behind the garage.
The next order of business was to begin building the metal framework. This consists of welded wire (re-mesh) and reinforcement bars (re-bar) that are wired together. Essentially, you create a sandwich with the re-mesh on either side of the re-bar all rigidly tied together. Here are two photos of the work I completed in September 2008:


Sadly, after getting started on the framework, I did not get back to the construction of the cistern until Tuesday and Wednesday of this week. We decided about two weeks ago that we should go ahead and get the cistern constructed and start using it sooner rather than later. So, I enlisted the help of a good friend who came over this week to help me.
The first day we worked on finishing the metal framework for the floor. We had to add another layer of re-mesh and a layer of chicken wire on top. Wiring all the layers together takes time and quite a bit of wire. The end result is a framework that is strongly joined together and that will make for a strong cistern. The different layers are offset from one another so that the spaces between the wires and re-bar become smaller and smaller.
The following two photos show the floor ready for to be poured:


We finished the framework on Tuesday after a full day of work. On Wednesday we began with the concrete. I bought an electric concrete mixer for this project and later projects, including plastering the straw bales on our new house this summer. I already had sand and bags of cement that I had bought in 2008 for the cistern project. The sand was fine, but the cement had absorbed some humidity.
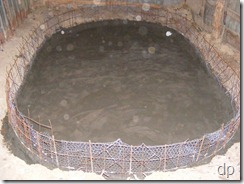 We carried the concrete mix into the shed in buckets and used trowels to force it into the framework. We had to build it up at the edges to the point that the walls would later extend from. I also put in a drain line and an outlet pipe. It took a full day, but we got the concrete finished for the floor (sorry about the dust spots on the camera lens).
At this point in time, I’m not sure that the concrete is going to set up hard enough. I think the cement didn’t work properly, probably from having absorbed moisture during the last year and a half. At first, it seemed like we had nothing more than wet sand, but it is hardening somewhat. I just don’t know if I will be able to trust it for completing the cistern. The dimensions I designed for the cistern would provide about 5,000 gallons of water storage. That’s a lot of weight and pressure.
Our current thinking while we wait on the floor to cure completely, is that we may put in two 2,000 gallon poly water tanks. They will sit on this floor with no problem. I can add some wire around them which will attach to the stub wall that is already framed. Then, inside this wire, I can insulate around the poly tanks with sawdust or some other material. We are not sure yet which way we will proceed. The poly tanks would cost a bit more, but they would save a lot of time and labor. We’ll decide for sure in the coming days.


